We explore 3D visualization: stages of work, software selection, lighting and material settings, model requirements, common mistakes, and ways to improve render realism.
The main value of 3D rendering studio is the controllability of the result: you can change materials, lighting, composition, and environment without the expense of physical prototypes. However, image quality depends not only on “beautiful” textures, but also on the accuracy of the models, proper lighting, a correct camera, and an understanding of how rendering works.
How the 3D visualization process works
A typical pipeline consists of several stages, each with its own risks. A scale error or an incorrectly set normal in the model can lead to lighting artifacts, while improper camera exposure can result in a flat image even with good material.
Modeling and Geometry Preparation
A high-quality model is the foundation of the final result. Visually unnoticeable flaws often become problems during rendering: uneven chamfers, surface intersections, incorrect topology, and lack of thickness in parts. For architecture and objects, true proportions and scale are essential.
- Bevels and fillets: without them, an object looks “computerized” because in reality, edges are almost never perfectly sharp.
- Clean geometry: avoid self-intersections and duplicate polygons to avoid flickering and noisy shadows.
- Optimal detail: extra polygons increase rendering time, but a lack of shape spoils reflections and silhouettes.
Materials and textures: verisimilitude through physics
Modern visualization relies on the PBR approach: materials are described by parameters close to physical ones (roughness, reflectivity, metallicity, IOR). In this case, not only the basic color texture is important, but also additional maps that create microrelief and reaction to light.
- Roughness determines the nature of glare: from matte surfaces to glossy ones.
- Normal/Bump add subtle irregularities without weighing down the geometry.
- Displacement changes shape at the rendering level and requires care to avoid creating a “broken” surface.
A nuance: the same material looks different depending on lighting. Therefore, materials are evaluated only in conjunction with “light + camera + environment.”
Light and Camera: Where Volume Is Born
Light shapes the readability of form, mood, and level of realism. For interiors, accurate sources (windows, lamps) are important, as is the balance between natural and artificial lighting. The camera sets perspective and the perception of scale, so the choice of focal length is critical.
- HDRI helps quickly achieve natural reflections and soft fill light.
- Key and fill lights simplify contrast and highlight control.
- Exposure and white balance have a greater impact on the believability of materials than you might think.
Applications: architecture, interiors, product renderings, VFX
3D visualization is used where it’s important to see the result in advance, test hypotheses, and agree on details before production or construction. It combines data accuracy with image clarity, allowing you to quickly evaluate shape, scale, materials, light, and environment.
The choice of visualization approach depends on the task: in some cases, photorealism is important, in others, iteration speed and readability are key, and in some projects, realistic physics and integration with real-world footage are crucial. Below are the key areas of application and their nuances.
Main Directions and Their Features
- Architectural visualization: exteriors, master plans, aerial shots, visual concepts. Key considerations include accurate scale, realistic lighting (time of day, weather), environment and context (landscape, development), and compliance with design documentation. A series of camera angles and variations of façade materials are often in demand.
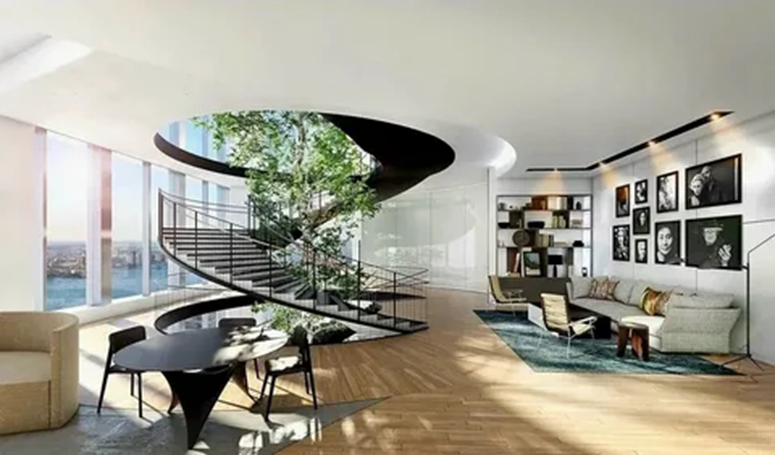
- Interior visualization: demonstrating layouts, finishes, furniture, and lighting scenarios. Important considerations include realistic materials (fabric, wood, metal), human-level detail (seams, chamfers, micro-irregularities), correct camera operation (focal lengths, perspective distortions), and a balance of natural and artificial lighting.
- Product renderings: images for marketing, e-commerce, presentations, and packaging. The priority is clean shading, accurate colors and textures, glare control, and perfect geometry and composition. Modular scene assembly and rendering in multiple states are often used: color variations, configurations, exploded views, 360°.
- VFX and CGI for video: integrating 3D objects into live action or fully digital scenes. Camera tracking, matchmove, lens and exposure matching, realistic shadows/reflections, simulations (smoke, fire, destruction), compositing, and color correction are critical. Quality is perceived in motion, so stability and flicker-free performance are essential.
Bottom line: 3D visualization is a versatile tool that adapts to various industries and formats: from static shots to complex video pipelines. The more precisely the goal (approval, sales, impact, design demonstration) and quality/timeline requirements are formulated, the more effectively the technologies, depth of detail, and set of stages—modeling, lighting, materials, rendering, and post-processing—are selected.